7 Tips for Dressing Your Baby as Lord Krishna
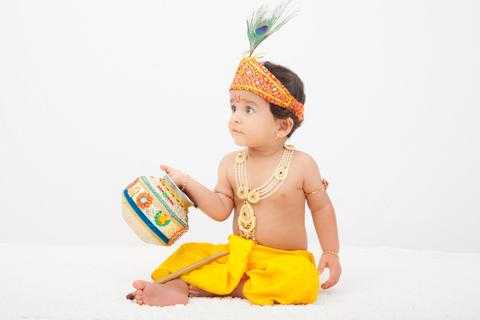
Krishna Janmashtami is a Hindu festival which is celebrated every year to mark the birth of Lord Krishna. It is celebrated in various parts of the country and especially in North India where it is celebrated with lots of zeal and enthusiasm. On this day many parents dress up their children, be it girls or boys as Lord Krishna and make them participate in the Janmashtami celebration. If you are also one of those parents who are eager to dress up their young children as Lord Krishna, this Janmashtami then we are here to help you in that auspicious process.
Essentials required for Dressing your Kid as Lord Krishna
1. Dhoti
The first and foremost thing that’ll make your child appear more like Krishna than any other accessory is wearing a Dhoti. The ocean and sky are blue in colour that’s why Krishna seems to appear wearing yellow coloured clothes according to mythology. (pitambar). Yellow stands for giving light and direction. So when going for a Dhoti, if you prefer yellow color then it is more likely that your child will look exactly like Kanha.
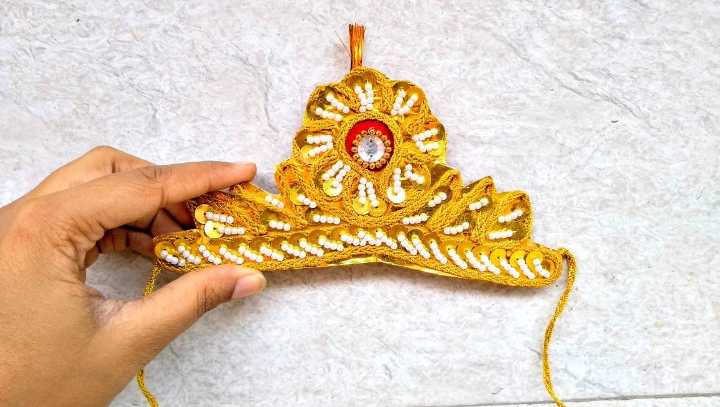
2. Crown
A crown or Mukut also takes part of Lord Krishna’s attire. You can buy a crown easily from the market or you can also DIY at home as it is very easy to make. Make sure to add stones and mirrors to it to make it look original.
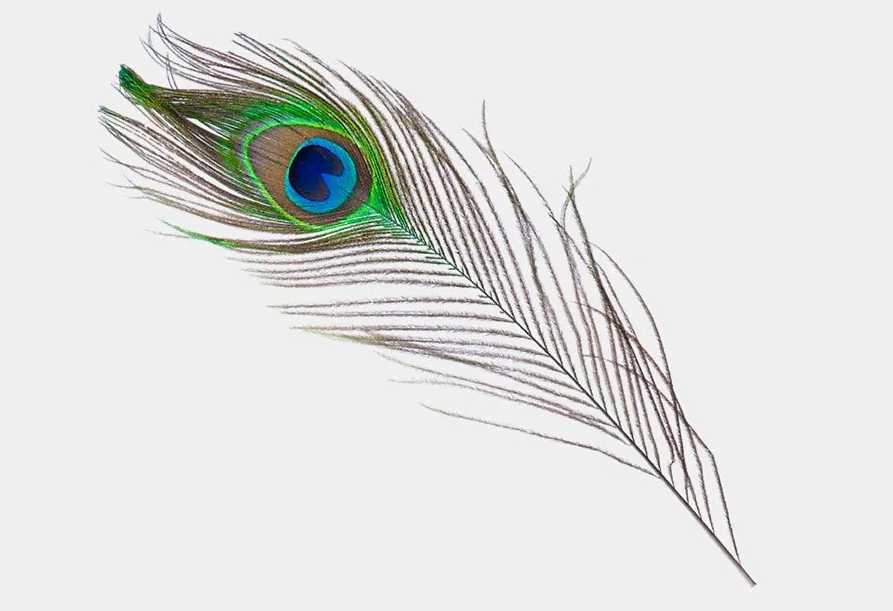
3. Peacock Feather
Lord Krishna wears the peacock which symbolises the entire range of colours humans are made of and that each one of us is a part of the almighty. A peacock feather is synonymous to Lord Krishna, and thus, it is a very important accessory for kids who want to dress up as Krishna.
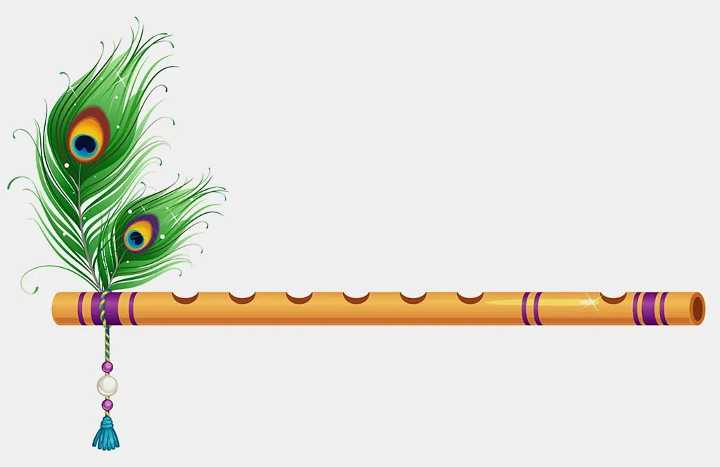
4. Flute
A flute will play a major role in making your kids more like Kanha. Krishna always has a flute in his hand that’s why he is also . According to mythology Krishna used to enchant all the people around him by the enchanting melodies played by him on his flute.
5. Butter Pot
As you may already know that Krishna loved eating butter or “Maakhan”, that’s why you can make your kid hold a butter pot in his hands to make him resemble Lord Krishna.
6. Jewellery
Make sure to accessorize your child in loads of necklaces, anklets, bracelets etc. This step will add colors to his/her look. In tv serials and movies Krishna is always enclothed in jewellery so make sure that you don’t miss this step.
7. Makeup
Make sure to add the final touches to your baby’s look by adding a tilak on his/her forehead. The Tilak has a spiritual significance and also brings the whole look together.
Krishna Costume Ideas for Babies
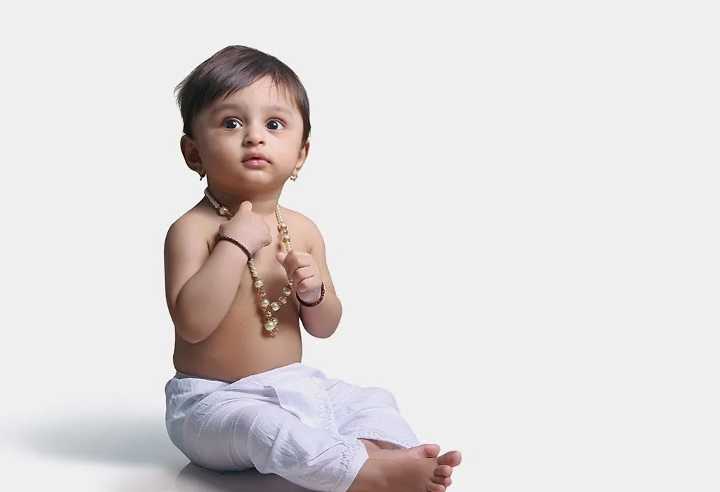
1. White Minimalistic Krishna Costume
For this idea you just need to have a white coloured dhoti and some accessories like gold-colored and pearl jewellery bracelets, armlets, a red or a maroon dupatta, and a peacock feather. Dress up your child with all these accessories and you’d be all eady with your in-house kanha
2. The Maakhan Chor Costume
For this look you will need a dhoti, some accessories, such as a pair of bracelets, anklets, a black thread and a dull gold coloured scarf.
After dressing your baby in the dhoti, loosely scrunch together the scarf lengthwise and wrap it around your baby’s head and tie a gentle knot. Tuck a peacock feather in it. Then tie the black thread around the waist or the neck and that’s it the maakhan chor look is ready.
3. Bright Yellow Costume
For this look, you will need a yellow coloured dhoti and kurta, you can also go for an angrakha shirt, some gold paper ornaments, a comfortable fitting crown or a traditional-print bandana, and a peacock feather. Now give your little one a flute and put a tilak and that’s it your little one will be ready.
How to Make Krishna Costume at Home
Making a Krishna costume for your little one can be a fun activity. If you have got the time and patience to create a costume for your child then here are the steps that you need to follow:
1. Dhoti
Draping a dhoti might seem like a challenge, but in reality it is very easy. If you already have a mundu or a dhoti, you can fold it in half and use it or you can create a whole new dhoti by using your old saree.
Things required
● Silk or a cotton dupatta/saree or a Mundu.
Steps:
- Take a dupatta or a mundu and fold it lengthwise if you want then instead of folding you can also go for cutting it.
- Wrap it around the child’s waist like you would tie a sarong, keeping about 1/4th of the fabric on one side and the remaining (the longest side) on the other.
- Tie a knot in the center.
- Then, take the lower front corner of the short end of the fabric, and from between the legs, drape one leg and take the end behind from under the fabric. Tug it gently so that it fits properly and tuck it in the center over the fabric.
- Then, take the longest end of the fabric and hold its width with both your hands. Now, make pleats and bring the two corners neatly together. Tuck it in the centre where the knot is tied.
- You will have a loose opening of the fabric length after tucking in. Gently pull it out and make pleats. Tuck these pleats in next to the center.
2. Crown
Things Required:
- A yellow chart paper
- Glue
- Scissors
- Sketch pens
- Embellishments
- Thread/Measuring Tape
- Pencil
Steps:
- Cut a 2-inch thick strip from the yellow chart paper.
- Measure the circumference of your child’s head.
- Cut the strip in that length.
- Now, use a pencil to outline the top of the crown. Give it a shape you desire.
- Cut along the outline.
- Glue the ends of the strip.
- Decorate the crown with your favourite colours.
3. Flute
If you cannot buy a flute for your baby, make one with some paper.
Things required
- Newspaper
- Glue
- Scissors
- Paint
- Embellishments such as lace, tassels, etc.
Steps to Follow:
- Take a newspaper and roll it till you get the desired thickness.
- Glue the loose ends of the paper properly. Let it dry.
- Then, cut a conical shape or a blunt point on one end of the roll. Glue any loose edges and leave it to dry.
- Decorate the flute with a golden paper, some ribbons, tassels, etc.
4. Peacock Feather
Things required:
- Chart Paper
- Iridescent blue, light blue, a bright shade of green, copper, and turquoise paint
- Scissors
- Pencil
- Paintbrush
Steps:
- Draw a feather outline on the chart paper. You can even take a printout.
- Paint the feather; It’s alright if it is not perfect.
- Then, cut along the outline leaving the bottom thick to enable you to glue it to the crown or tuck it in a ponytail.
- There you have it; your peacock feather is ready.
5. Butter Pot
Things required:
- Large-sized balloon
- Lots of paper (preferably newspaper)
- Glue
- Water
- A pair of scissors
- Plastic or a wooden bangle
- A string of thread.
Steps:
- Blow the balloon till it inflates to medium size.
- Tie the opening and push it inside the balloon till you reach the bottom of it.
- With another hand, hold the pushed end at the bottom and secure it with a thread.
- You should get a pot-like shape instead of a usual oblong. Mix some water and glue in a bowl.
- Shred the newspaper into small pieces. Dip each piece and stick it all over the balloon. Ensure each piece overlaps with the other pieces surrounding it. Cover the entire balloon this way, leaving a circle at the top centre. This will be the mouth of the pot.
- Keep sticking the newspaper pieces till you have a nice thick layer of paper over the balloon. Leave it to dry.
- Take another sheet of newspaper and dip it in the water and glue solution. Cover the entire bangle till you get a rim of your preferred thickness. Keep it aside to dry with the pot.
- Once the pot and the ring are completely dry and hard to touch, burst the balloon and remove it.
- Draw a circle (a little smaller than the size of the circular paper ring) at the opening of the paper pot and cut the rough edges.
- Glue the ring on the opening. Leave it to dry.
- Fill the pot with some cotton.
Your butter pot is ready
6. Jewellery
Things required:
- Gold-Coloured Paper
- A soft but thick thread or soft yarn
- Some beads (optional; do not use beads for infants and toddlers)
- Glue
- Scissors
Steps:
- Cut triangles and circles from the gold-coloured paper.
- Cut one string or soft yarn for the necklace, two for the bracelets and two for the anklets. Measure them before cutting them. Ensure you have enough to tie the ornaments.
- Glue the triangles and circles on each string and the order you like and leave them to dry.
- Once they are ready, tie the strings around the neck, the ankles and the wrists. Ensure your child is comfortable in the jewellery.
Tips to Keep in Mind Before Dressing Up Your Baby as Lord Krishna
1. Feeding Properly
Make sure to feed your baby properly, before dressing them so that they don’t have a bad mood during the process of portraying Lord Krishna.
2. Good sleep
Make sure that they have had a good sleep before dressing them up as this may lead them to be irritated.
3. Don’t add too much accessories
Do not go overboard with accessories, only add that much amount which would be comfortable for your child to carry. In case they get irritated because of a certain piece of jewellery make sure to remove it.
4. Don’t Paint
Do not paint your baby’s skin as it may give them rashes and can cause infection.
5. Good quality cloth
Make sure to choose a good quality cloth for their Dhoti and upper wear so that they don’t feel uncomfortable.
So, these were some very important steps that you need to keep in mind if you are thinking of dressing your little one as the Lord Krishna this Janamashtami. We hope that we were able to provide you with all the information that you needed.